

In the previous articles in the series we have covered much in depth about What is GitHub, how to add files and commit changes and how to create repositories. Now in this piece of writing we will talk about GitHub Branches.
Lets get Started.
What are GitHub Branches?
A branch is a unique set of code changes with a unique name and each repository can have one or more branches.
By default upon creating a repository GitHub creates a default branch for you, this is where all changes gets merged back into, and it is called the main branch.

When working with GitHub as a team do no mess with the main branch, because this might affect everyone 's work. The reason why the main branch is so important is that the main branch is deployable, that's why it's meant to be stable.
Now in a case of working as team that's why you need to create a branch so that you can have the same copy of the main code which you can modify and later sav the changes without affecting the main branch.
Through the branches created from the main you can:
- Make edits
- Add new code
- Add changes and documentation too
before adding it back to the main branch for approval. After rolling it back in and is aprroved all the edits added will be updated to the main branch.
How to create a new branch.
We have seen where we can find the default branch, and also where we can see the number of branches we have. Now lets see how to create a new branch.
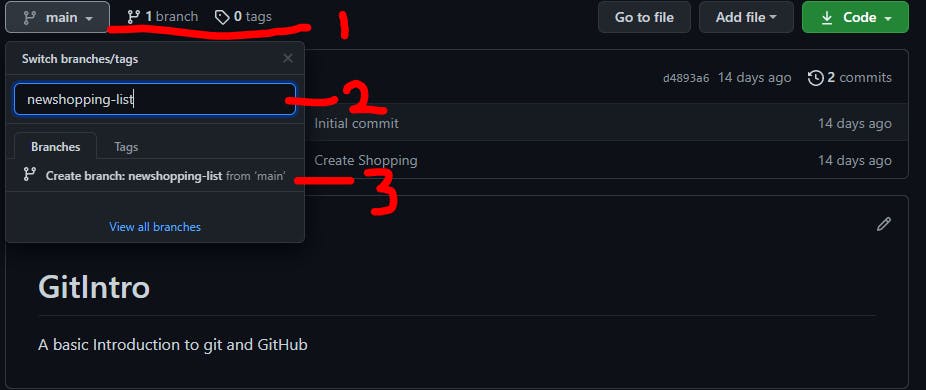
First we will have to be in the repository we want our branch created, click on the drop down arrow on the default branch name and there we type the name of our new branch and click create below it. Just three simple steps:
 Now as you can see our branch is added to the branches section:
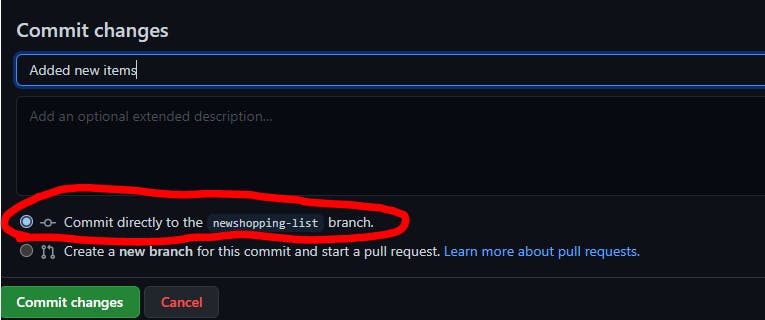
Now since we have created a new branch, in this created branch is a copy of the code we had in the main branch. Whenever we make changes to the code in the new branch we will have to commit the changes to the branch in order to save the changes.
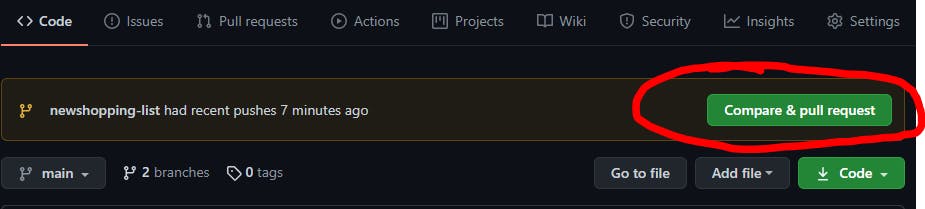
 After editing your created branch and committing changes at the top you will be prompted
create a pull request.
After editing your created branch and committing changes at the top you will be prompted
create a pull request.
What this basically means is that you are going to combine your new branch with the main one. By doing so this updates the main branch with our newly created branch.
 If you go ahead and click the button it will create a pull request, and merge the two branches
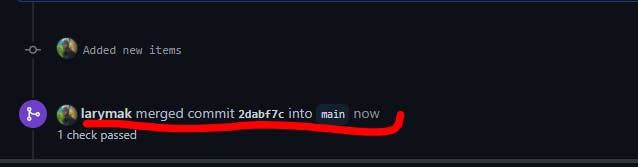
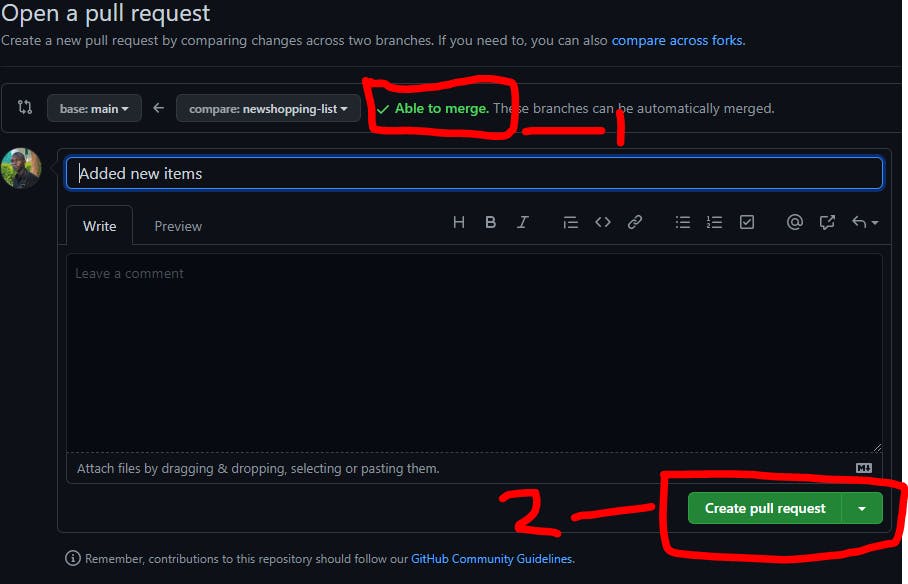 What the above action does is that it takes the code in the new branch and adds it to the main branch.
Conclusion
In this article we have seen how to:
- Create a branch
- Add new items to the newly created branch
- How to commit changes to the branch
- Create a pull request
- How to merge to the main branch
Stay tuned for the next article in the series
Like my work:

If You have read this far I really appreciate:
Check out my other Blogs too:
- Useful Resources for Programmers and Web Developers
- Key Differences Between A Website and Web Application
- Know The Difference Between Coding and Programming
- Best Visual Studio Code Extensions For Web Developers
Connect With me at Twitter | Insta | YouTube | LinkedIn | GitHub
Do share your valuable opinion, I appreciate your honest feedback!
Enjoy Coding ❤